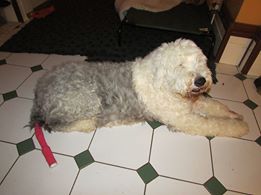
If you have a breed with a lovely long, waggy tail, you may well have encountered the nightmare that is a split tail tip or “Happy Tail”. Usually, as a result of some seriously exuberent wagging, the tail may come into contact with a stationary object such as the door frame or wall and when “thwacked” with great force, a split can appear in the tip which then bleeds and showers the walls and ceiling with gory red spatter … all that red spray often looks worse than it is, as if an axe murderer has rampaged through your house! So, what should you do?
Once again we need to re-visit the ‘SEEP’ technique that I’ve mentioned so many times before in other blogs ie, Sitting or lying the dog down, Examining it so we know what is going on, Elevating it (for a short time just holding it up should suffice) and putting Pressure on it with a wound dressing to stop the bleed.
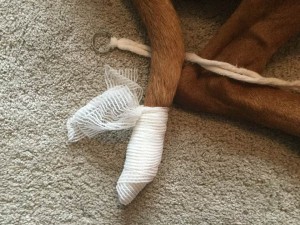
Again, after around 5 minutes, the tip should have begun to clot but this wound will need protecting for some time to prevent it opening up every time they wag and show their affection to you. Fold a wound dressing around the tip of the tail and hold it in place right from the tip to a fair way up the length of the tail with a strip of vet-wrap to cushion the tip of the tail. The vet-wrap will need to go a good distance up the tail to prevent the dressing flying off with each and every swish of the tail. Keeping the dressing on can be quite a challenge and if your furry pal is making this tricky, see our blog on preventing them licking wounds and picking stitches which, hopefully, may help you get around this problem: Stop Licking Wounds
After a couple of days, the wound should have begun to heal quite nicely but there is still the very real risk of it re-opening with each wag. A good method to try is to insert the tip of the tail into a tube just wide enough so that it’s not quite touching the tail too much (something like a couple of inches of foam pipe lagging/insulation from a DIY store, or the shaft of a plastic syringe for example for smaller breeds) or better yet, a foam hair roller with the outer “grippy” bit removed.
The important thing is that whatever tube you choose, it should have an open end rather than being completely sealed. We want the air to be able to circulate around the tip of the tail to help it heal and so making sure there is a hole at the end will allow it to breathe as well as protect it from further wagging incidents.
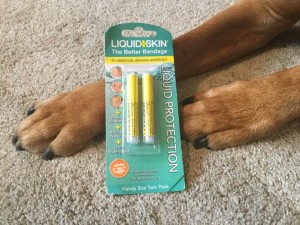
If the tail refuses to heal, you can of course opt for a first aid super glue to “stick” the wound together. There are several on the market that are recommended for skin use. The monomeric formulation forms a thin, waterproof adhesion to bond/seal tissue in a variety of injuries. This type of glue is ideal for skin closure, sealing broken nails and generally used as a “quick fix” and will usually stay on for around 3-4 days. It should not be applied to an actively bleeding/open wound.
Please DO NOT use regular super glue that you can just pick up on the high street. These types of glues work with an exothermic reaction which basically means they give out heat as they stick – enough heat in fact to burn the tissues of the tail. This is why we recommend only the appropriate first aid grade versions.
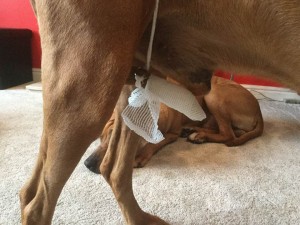
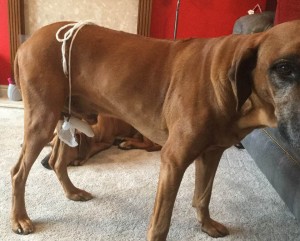
Often, keeping the tail from wagging is the only way to give the injury time to heal. The best way we have found to accomplish this is to secure the tail between the legs (not TO the leg itself). There is something I’ve seen that you can buy to do this called, I believe, a “Tail Bandit” … but this is the R2S cheap as chips version 😉
First, find yourself a length of ribbon or bandage (probably about 2 meters in length for a large breed dog) and a keyring. Loop the ribbon through the keyring as per this picture:

Next, pass the ribbon around the tail and slot it through the keyring to secure it to the tail itself without pinching the tail hard or cutting off the circulation:

Next, stand the dog and bring his tail between his legs with the ribbon coming up and over his back just in front of his hips (be sure NOT to tie the knot on the dog’s spinal area … always better to tie it slightly over to one side to prevent any discomfort of the knot pressing on his vertebrae)
Keeping the skin as healthy as possible is the quickest way to get it to heal. A tried and tested method to help the skin remain healthy once the wound has closed up was sent to me from Yvonne Bowker … a Ridgeback owner of many years’ standing and with a lot of experience in treating split tail tips. Yvonne’s “insider info” is as follows:
1) Wash the affected area and gently clean off any scabby bits with warm salted water.
2) Dry thoroughly.
3) Use Udder Cream or Bag Balm, (available from farm/equine supply stores)
4) Gently massage cream onto affected area
5) Cover with sterile gauze or cotton
6) Wrap from tip to root of tail with Vet Wrap, moulding to the shape of the tail
7) Change 2 x per day and treat as above